Automotive Retouching_XiaopengG9 KV Retouching_Post-production Retouching Thought Sharing
Hello everyone! Today, I'd like to share with you an automotive retouching case from my time working at Xiaopeng Motors. We will discuss the G9 KV retouching approach. I've selected a representative image to explore and learn retouching techniques together.
First, we should know that there was no real car at the time, so we used the CGI background set method for the vehicle. The background was actually rented from a beautiful image library. Although a bit pricey, the realistic and natural lighting made it very appealing to designers.
I. Retouching Approach Let's first look at the original image. As a retoucher, when you receive the material, you need to observe the overall:
The perspective relationship between the car and the background is good, no need for major changes;
The overall color tone needs to be adjusted to meet the requirements of a KV image;
The lighting relationship of the car and its surrounding environment is good. This is a well-rendered 3D material. In the post-production, some modifications and enhancements need to be made in terms of lighting, color, and details;
The ground may need some changes, adding some contrast with the foreground to make the car more prominent. This might be difficult for beginners to understand, but continuous learning will surely yield gains.
The entire preliminary approach is mainly about considering the relationship between the car, the scenery, and the overall image.
II. Retouching Details
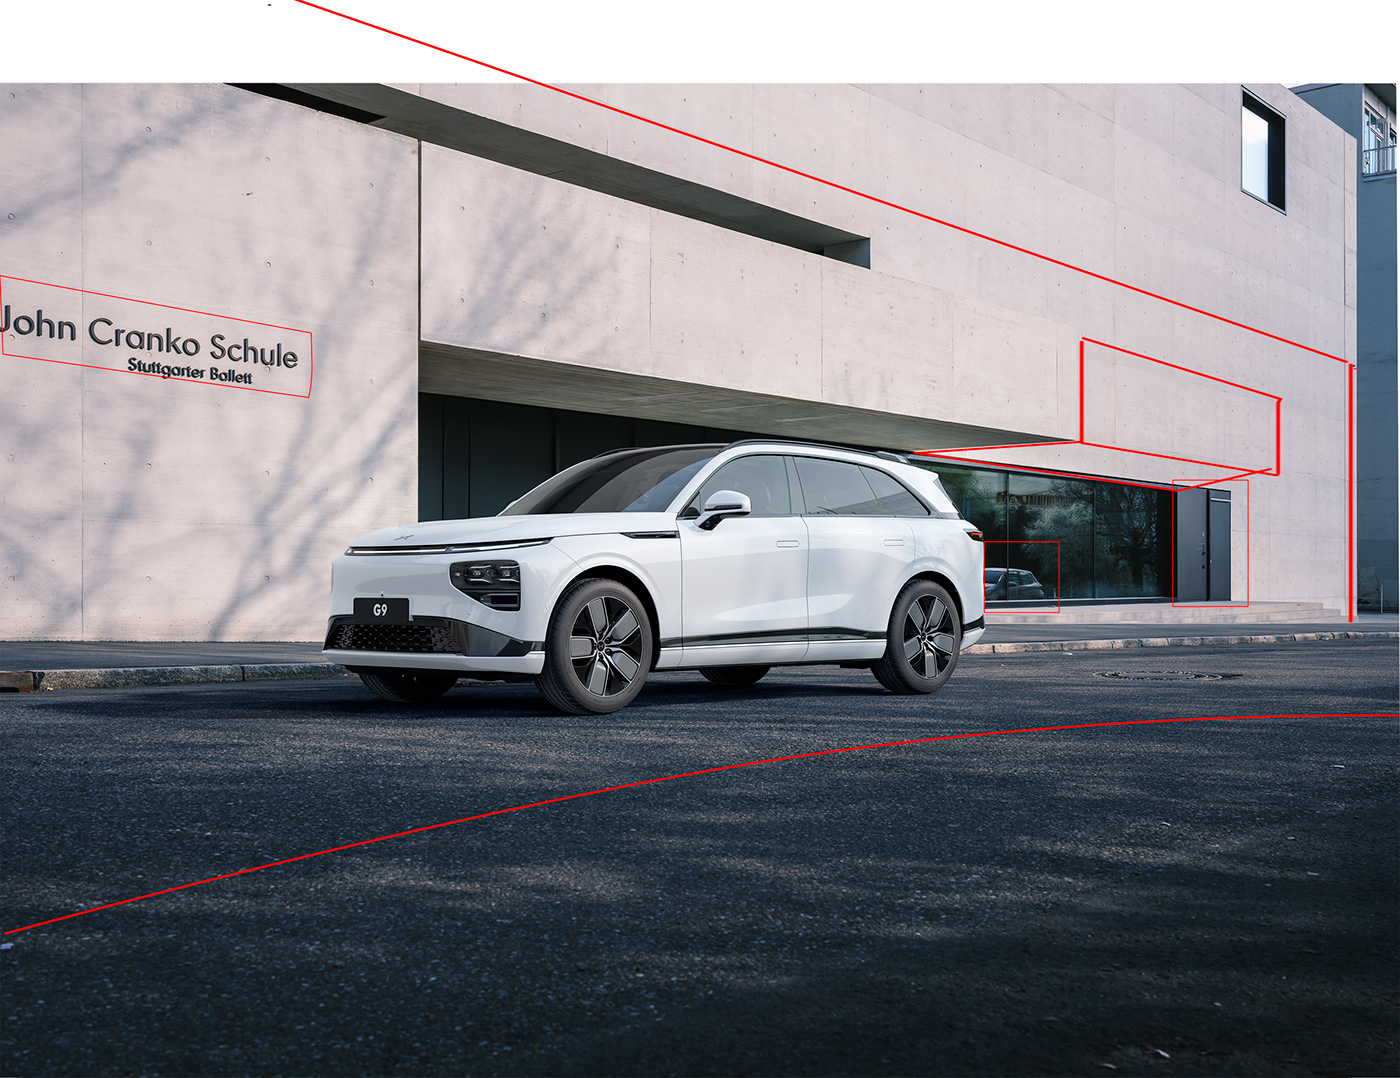
As marked in red below, pay attention to some details, such as the foreground projection and background sky. By properly handling the foreground, middle ground, and background, the sense of depth and space in the image will be greatly enhanced.
The color and lighting of the car's glass can be varied to avoid being too flat. The backlight should be slightly colder while also adding some details and layers;
The red wooden structure on the building serves as the finishing touch, providing a little color contrast and preventing the overall image from being too monotonous. Every element in the image deserves our consideration.
III. Retouching Tips
To make the image more realistic, add some small highlights to the car's illuminated parts to simulate the metallic reflective texture. This technique is inspired by real-life photography. I place these highlights on the top layer of the entire image, as shown below.
Highlights can also be adjusted using curves.
Although there are many people sharing images online, there are relatively few who share retouching ideas. I hope these thoughts can inspire you, especially for those new to automotive retouching, and help you avoid detours. If you like this kind of retouching thought sharing or have any other questions, please leave a message and like below, and I will try to reply one by one. If the response is enthusiastic, I will continue to share similar content.
My skills are average, and my abilities are limited, so I hope you can give me more advice. I sincerely hope that through this article, we can establish a friendly exchange atmosphere, learn together, and make progress together.